An Easy Way To Create An Underwater Look In Unreal
Unreal Engine is a great tool for making games. It has functions for a lot of the most common features people want, such as depth of field or fog effects as well as more complicated features like global illumination and ray tracing. However, they can’t supply functions for everything everyone needs right out of the box. Luckily the program is capable of producing a near-infinite amount of creations. Today we’re going to be looking at one that takes a little bit of manual setup, but with the help of Unreal Engine is easy and looks great. An underwater effect.
Gathering Reference
The first step is deciding how you want it to look. This step is easy to overlook but essential for getting the look right. The type of underwater scene can change drastically whether you are near the surface with lots of light or deeper with very little natural light. Whether the water has a more blue or green tone to it, how cloudy it is and many other things will vary whether you are making a scene in a small backyard pond, a pool, or out in the ocean.
For the scene I will be doing as an example, I want to create a dark scary ocean where there is little light, built for horror at the unknowable things lurking in the dark and cloudy depths. For this, I gathered reference images both traditionally, through image searching online, and through AI-generated art which I could prompt with keywords that helped me define a feel for the game.

Starting Your Underwater Scene
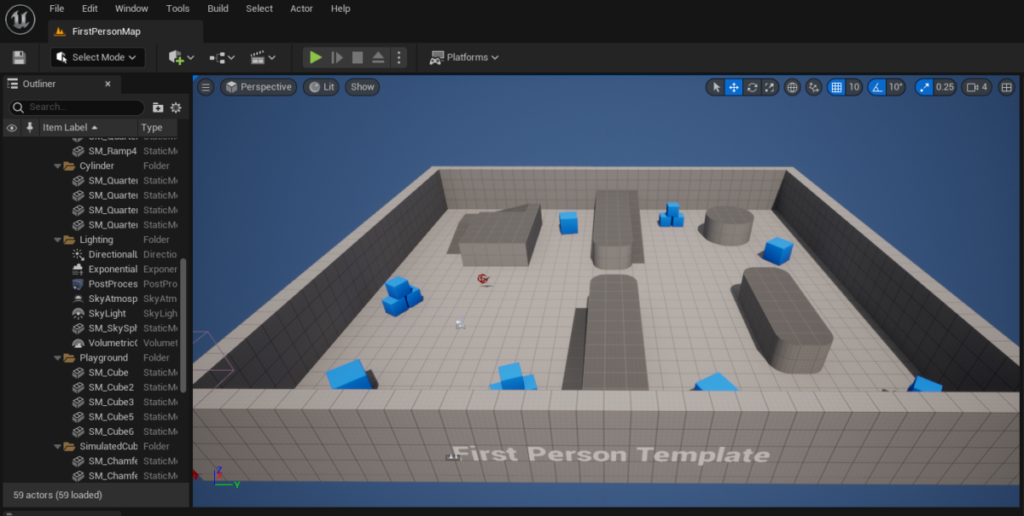
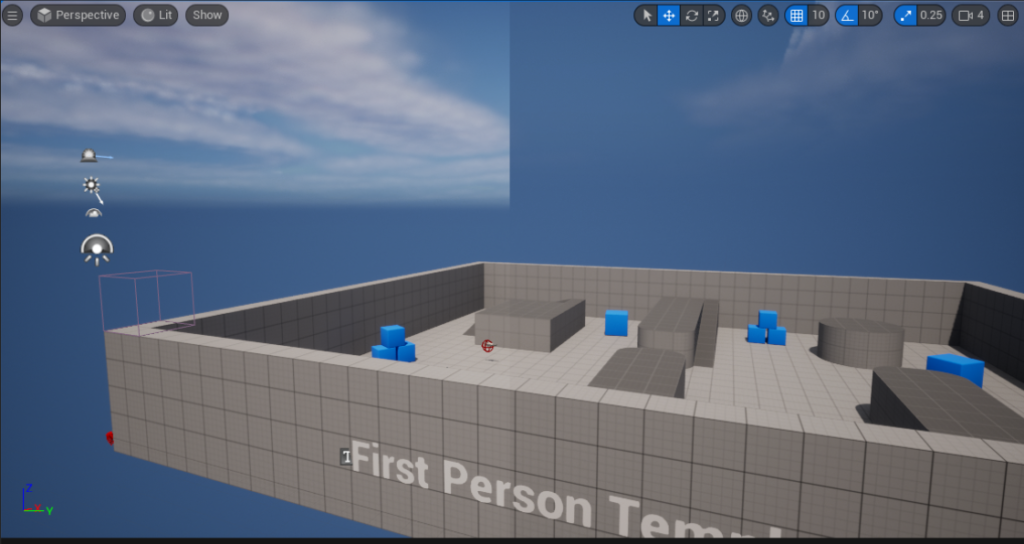
When you first open up Unreal you will be greeted with a generic open sky scene with a few key elements such as the Directional Light for the sun, Exponential Height Fog, and Post Process Volume. Whilst the scene is far from what we’re envisioning, it already has most of the components we need to get it to work, they just need tweaking to look more like how we want.
Using Exponential Height Fog To Create Underwater Cloudiness
Although fog is normally used to create… well… fog, it can be used to create the cloudy and murky-looking water that we want quite easily by using the same process. The Exponential Height Fog actor in the starting scenes outliner is perfect for this. Firstly we want to look at the Exponential Height Fog Component that is visible when selecting it.
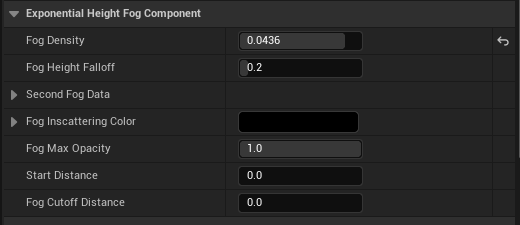
The first of these we will want to change is the Fog height Falloff. The exact amount you will want will depend on the scene you are working with, and dragging it backward and forwards will show you the effect in the scene. The lower the number the higher up the height fog starts. In our case, we want to be very low so that it looks like the fog is extending way above the level. That way it will look as though the surface of the water is way above us.
The next most important step is the Fog Density. This will want to be very high to get that murky look but will need to be less drastic if you want clearer water. If you use the slider you will find that it unsatisfactorily stops at 0.05 which is nowhere near what we want. Luckily Unreal Engine often lets you manually input a number outside of the normal range. In this case, we’re going to put it up to 2.0. Now we’re starting to see the murky depths come into being.

There are plenty of other settings to tweak to add different effects and feelings to your fog. Whilst these settings work as a good, simple baseline, I highly recommend going into them and playing about to see what things do and if they can improve the look you want. When changing the setting Unreal Engine gives you the choice to reset it to default, so you can always get back what you started with. Otherwise, it can be a good idea to copy the setting before playing with it and then paste back the original setting if you don’t like what you get.
Using Volumetric Fog To Add Depth And Light Interaction To The Cloudiness
The height fog has made a nice start to our underwater scene, but at the moment it is very flat and uniform. It doesn’t interact with light at all, which means you’re not going to be able to see much even when lit and it won’t be very interesting to look in. For this, we will want Volumetric Fog which can also be found in the Exponential Height Fog actor further down.
You will want to enable it by ticking the check box. At first, it will pop up as white, like regular fog, so we will need to add color to it. To do this you can click the white box next to Albedo and add a color of your choosing. This is where the reference can be useful. I tried to get a color similar to the AI-generated images above with some small tweaks based on how it looks in the engine.
There are other settings here that change to Volumetric Fog similar to the Exponential Height Fog which you can play around with to get the feel you want. We will be leaving these in this example.

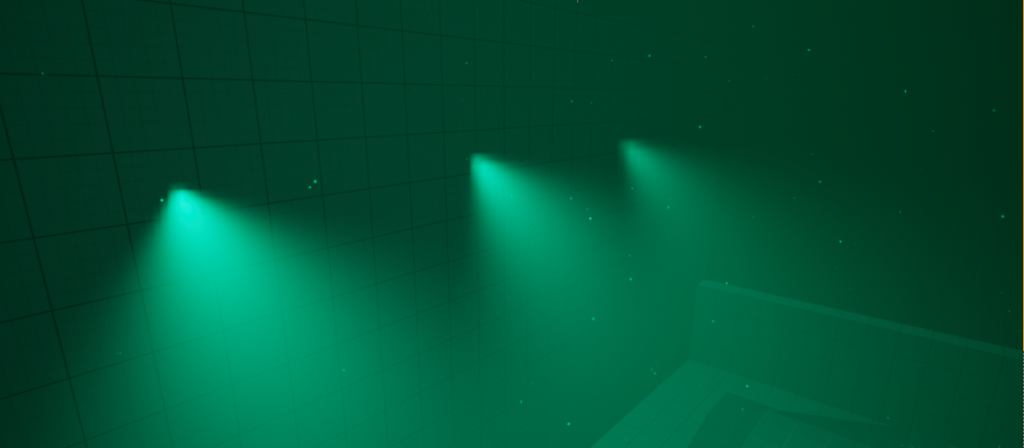
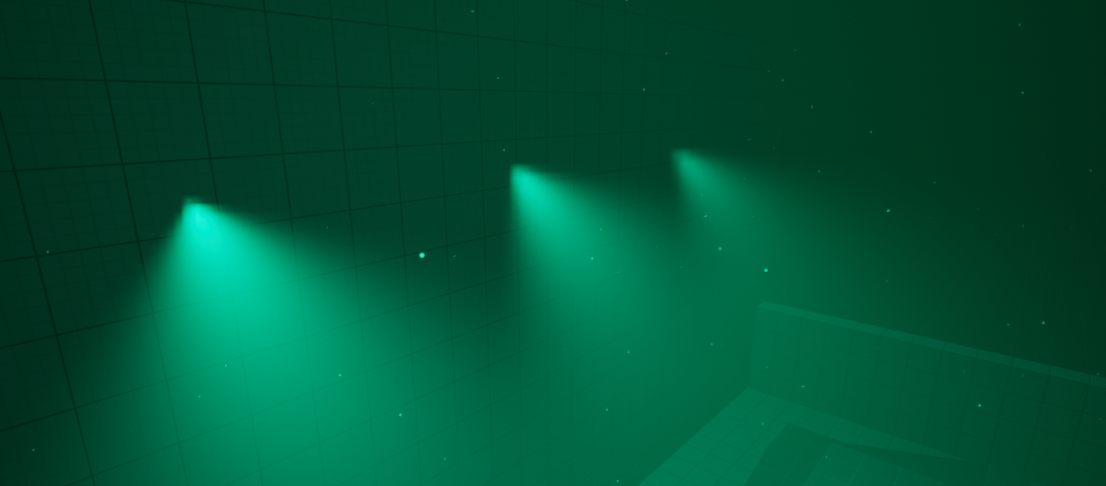
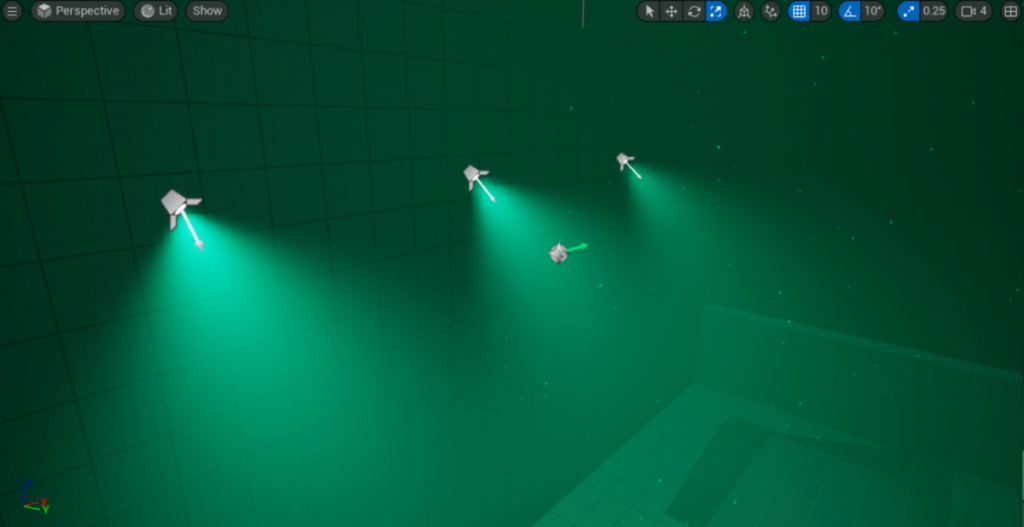
If we add spotlights to the scene with sufficient light strength we can now see the difference it makes. The lights will interact with this new Volumetric Fog in a way that looks like a lit mist, but in our case, it creates the look of cloudy water being lit.

Underwater Post Processing Effects
Post Processing is the process of adding something to the scene after the scene has been rendered. This can include a massive and varied list of additions that would be too much to cover here, and changing all the time. In Unreal Engine, there is a Post Process Volume that you can add that covers an area and can add a variety of effects to your scene. We start with one in the scene already, but we will need to scale it up so that it encompasses the areas we are in.
The first thing we can look at to sell the watery look a little more is Color Grading. At the moment the objects close to the camera are mostly unaffected and look normal, this is because we’re relying on the fog to add color to the scene. By adding a Temperature (Temp) and a Tint to it.

This will apply a color to the whole screen image, so it can affect what we already have, so bear that in mind while trying to get the color you’re after.
The result is that it will add a color tint to the rest of the scene, including those pieces up close, so it makes it seem more like the color of the water is coming through even before the fog takes effect further away from you.

Using Particles To Simulate Dirt And Small Creatures
Finally, the last thing we are going to add in this short tutorial is adding some particles to the water to simulate things floating around in the currents, such as dirt and small creatures. To do this we are going to be creating a Niagara Particle System by right-clicking in the content browser and selecting Niagara System. From there we will select New system from selected emitter(s) and then select Hanging Particulates. Then click the green plus icon and hit finish. This will give us a good base of floating particles to work with.
If you double click this new asset it will open up the Niagara Particle Editor. as you can see in the viewport to the left we already have some particles gently floating in the air (soon to be water). There are a few settings in here we can change to get it to look a little more water-like.
The first thing we can look at is the particle size. To do this we need to select Initialize Particle and find the Sprite Attributes. Here we will find Uniform Sprite Size Min and Uniform Sprite Size Max where we can enter the smallest and biggest size particles we want, and they will be generated somewhere in between. We’ve used the values of 0.5 and 2.0.
Another thing we can edit is the Curl Noise Force which is controlling the random floating motions that the particles are doing. Turning up the Noise Strength causes them to flow around more and become more erratic, looking as if they are being taken by small currents. We’re going to use 90 for this. The Noise Frequency affects how tight the curls are that they are doing. To make the currents look bigger we’re going to lower this value. For this, we are using 10.
Another thing you might want to consider doing for these particles is using Prewarm. What this does is start the particle effect before it first spawns, so that it doesn’t take time to build up and spawn all of the particles so it looks like it has always been running. To do this you need to click the Niagara Overview Node and find the Warmup section. Adding a Warmup Time of 2 seconds or so should be adequate.
There are a bunch of other functions that are well worth playing around with such as changing the sprite it uses, but for now, we will leave it as it is before it gets too in-depth.
Now we can save it and drag it from the content browser into the scene and you should see the particles floating around. You can scale up the emitter to cover a larger area, but the particles will be more spaced out so you can increase the spawn rate to make more. Play with scale and other settings and see what you can make!
And that’s it for this basic tutorial for creating an underwater scene in Unreal Engine. There are loads more we can add, and we will go more in-depth at a later stage in another tutorial. But it should give you a good base to work on in a simple and quick way. Where you take it from here is up to you!