Rigging and Skinning
Rigging and Skinning
Rigging and skinning for games are where you set up an object, normally a character of some kind, to animate. Here you can tell your
Rigging is all about creating a ‘skeleton’ that goes inside the character that defines exactly how the object should move and what restrictions it should have.
Skinning is how you let your model know exactly which parts of it should move when the rig moves. Combined these two aspects allow the model to move and for the animators to do what they do best.
How To Rig An Object
Skeleton
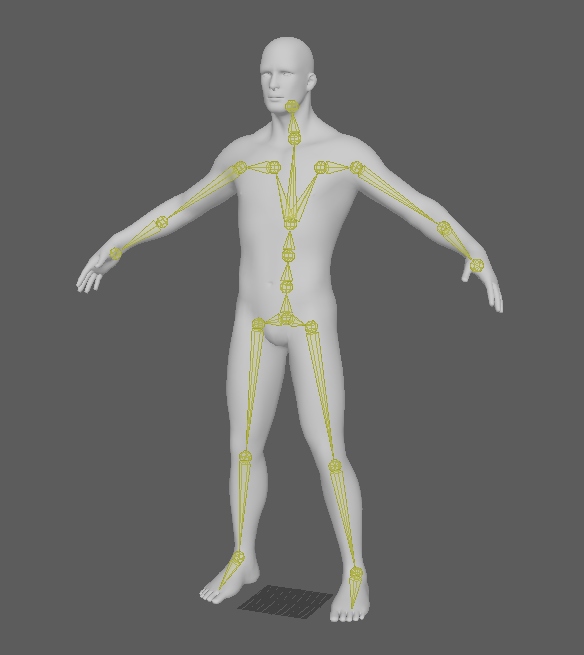
You begin by creating a rig that is essentially the skeleton of your character, this is sometimes referred to as the skeleton. Here you will place bones which you will then later skin the model to. The level of detail in the rig can have a big impact on performance and so many older games or games that need less individual character detail such as troops in a strategy games or the crowds in racing games will cut corners and use as few a bones as possible. A common and often noticable one is when characters have ‘mitten’ hand where all of the fingers use a single bone and as such, they all move exactly the same. The level of detail you go in to will vary based on the task and the user’s skill level.
Controllers
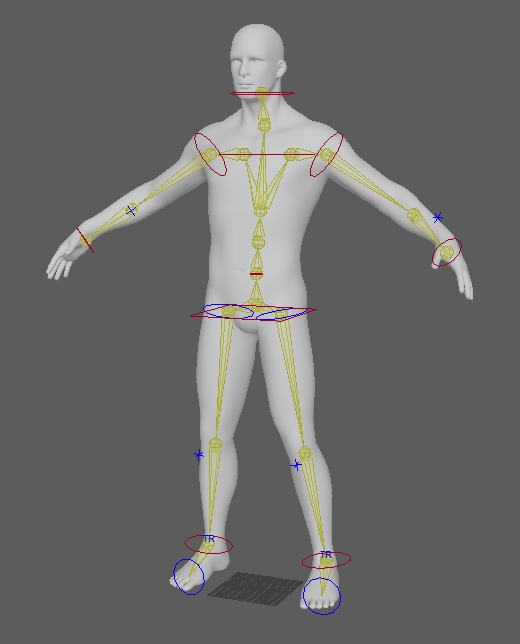
Riggers will also set up ‘controllers’ which the animator is able to use and grab to move the model around. There are objects within the animation software that animators can use to manipulate the models in different ways. One of the most common ones you will see is usually placed at the ends of limbs but they can be used to control a variety of things from facial expressions to belly jiggle. These controllers will not be rendered in the final piece, whether it’s a video or rendered in the game, this means that can look like whatever the rigger likes and will help the animation best.
Constraints
Rigs often have restrictions placed on them. A common one is set up so that bones can only rotate so far. For instance, an elbow joint only needs to be rotated just under 180° so the rigger can restrict it from bending in the opposite direction. This makes it easier for the animators to use and also less likely to break under stress. It also allows for automatic functions such as leg bends when lifting a foot without it doing something crazy.
Forward Kinematics vs Inverse Kinematics
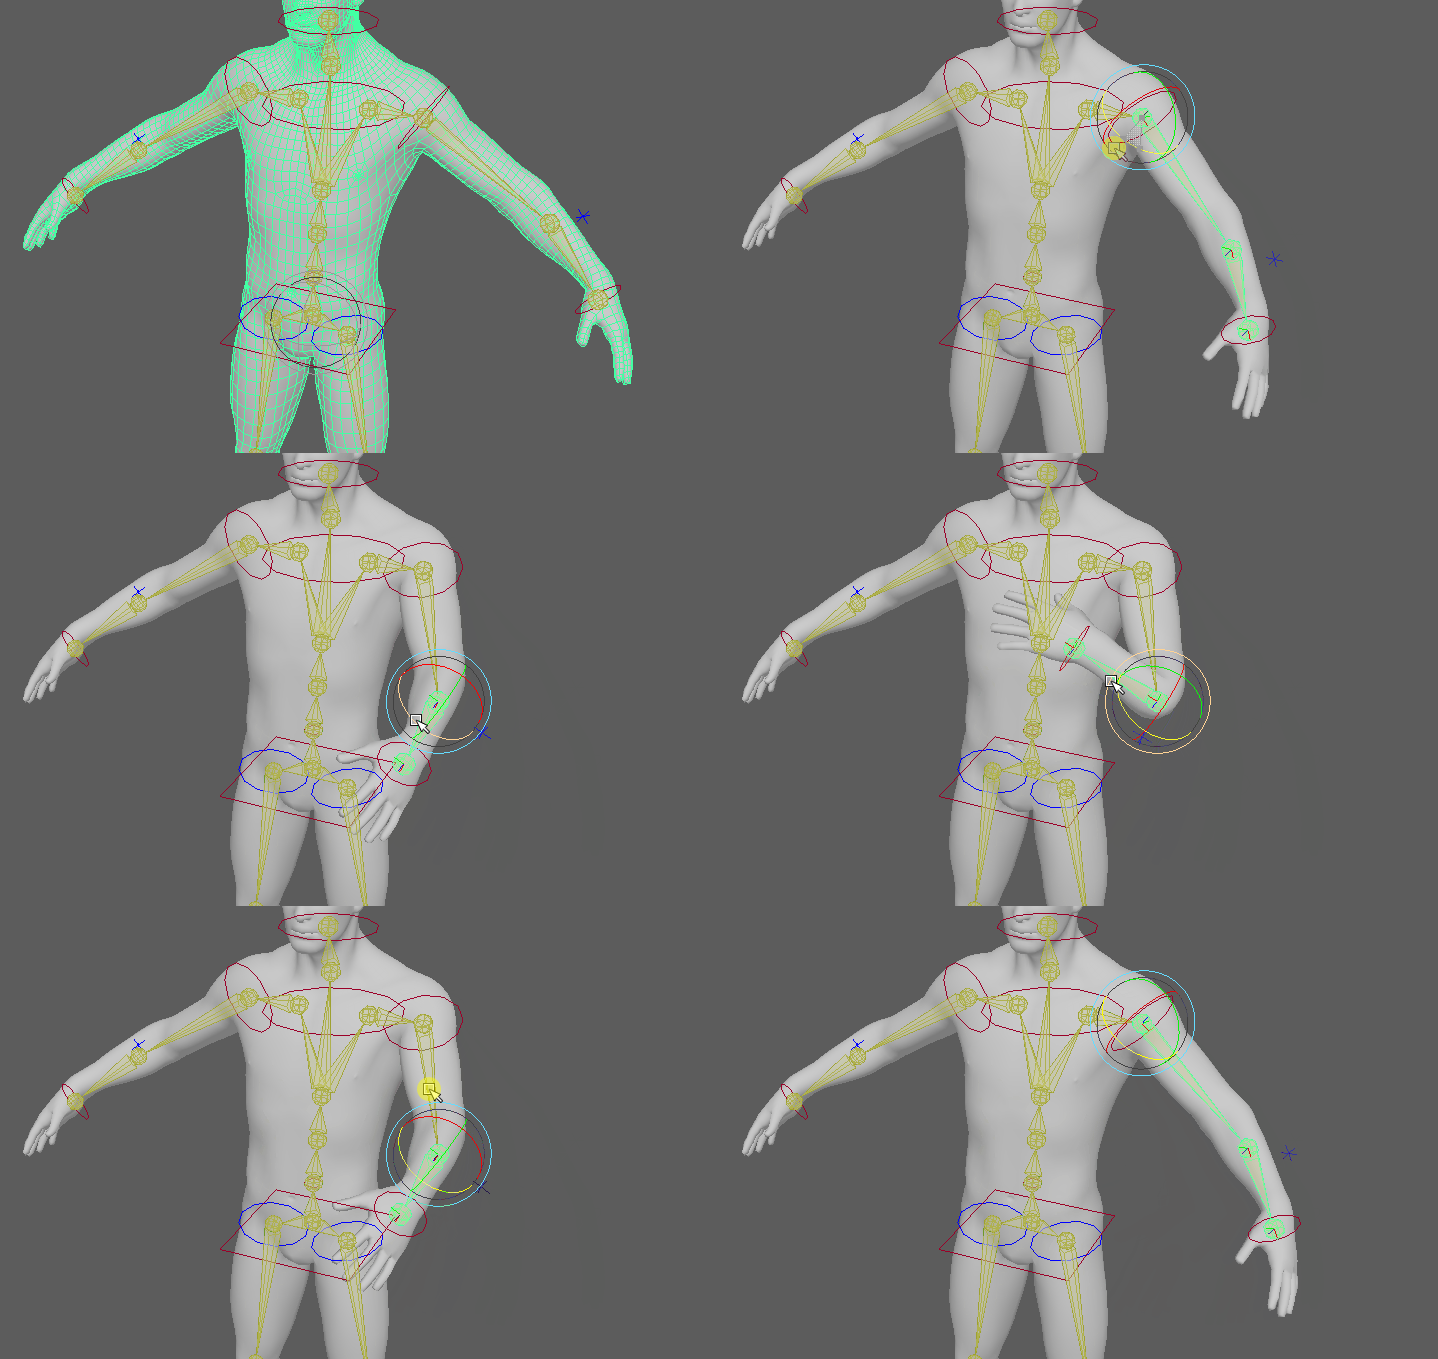
There are two types of movement that can be set up for the rig to use, FK and IK. FK or Forward Kinematics is done by rotating the bones around their pivot points, which are found at the base of the bone, and positioning them one by one, starting at the top of the bone chain and moving down. This is useful for animating things like fingers as you can have a greater degree of control over them. A combination of both FK and IK
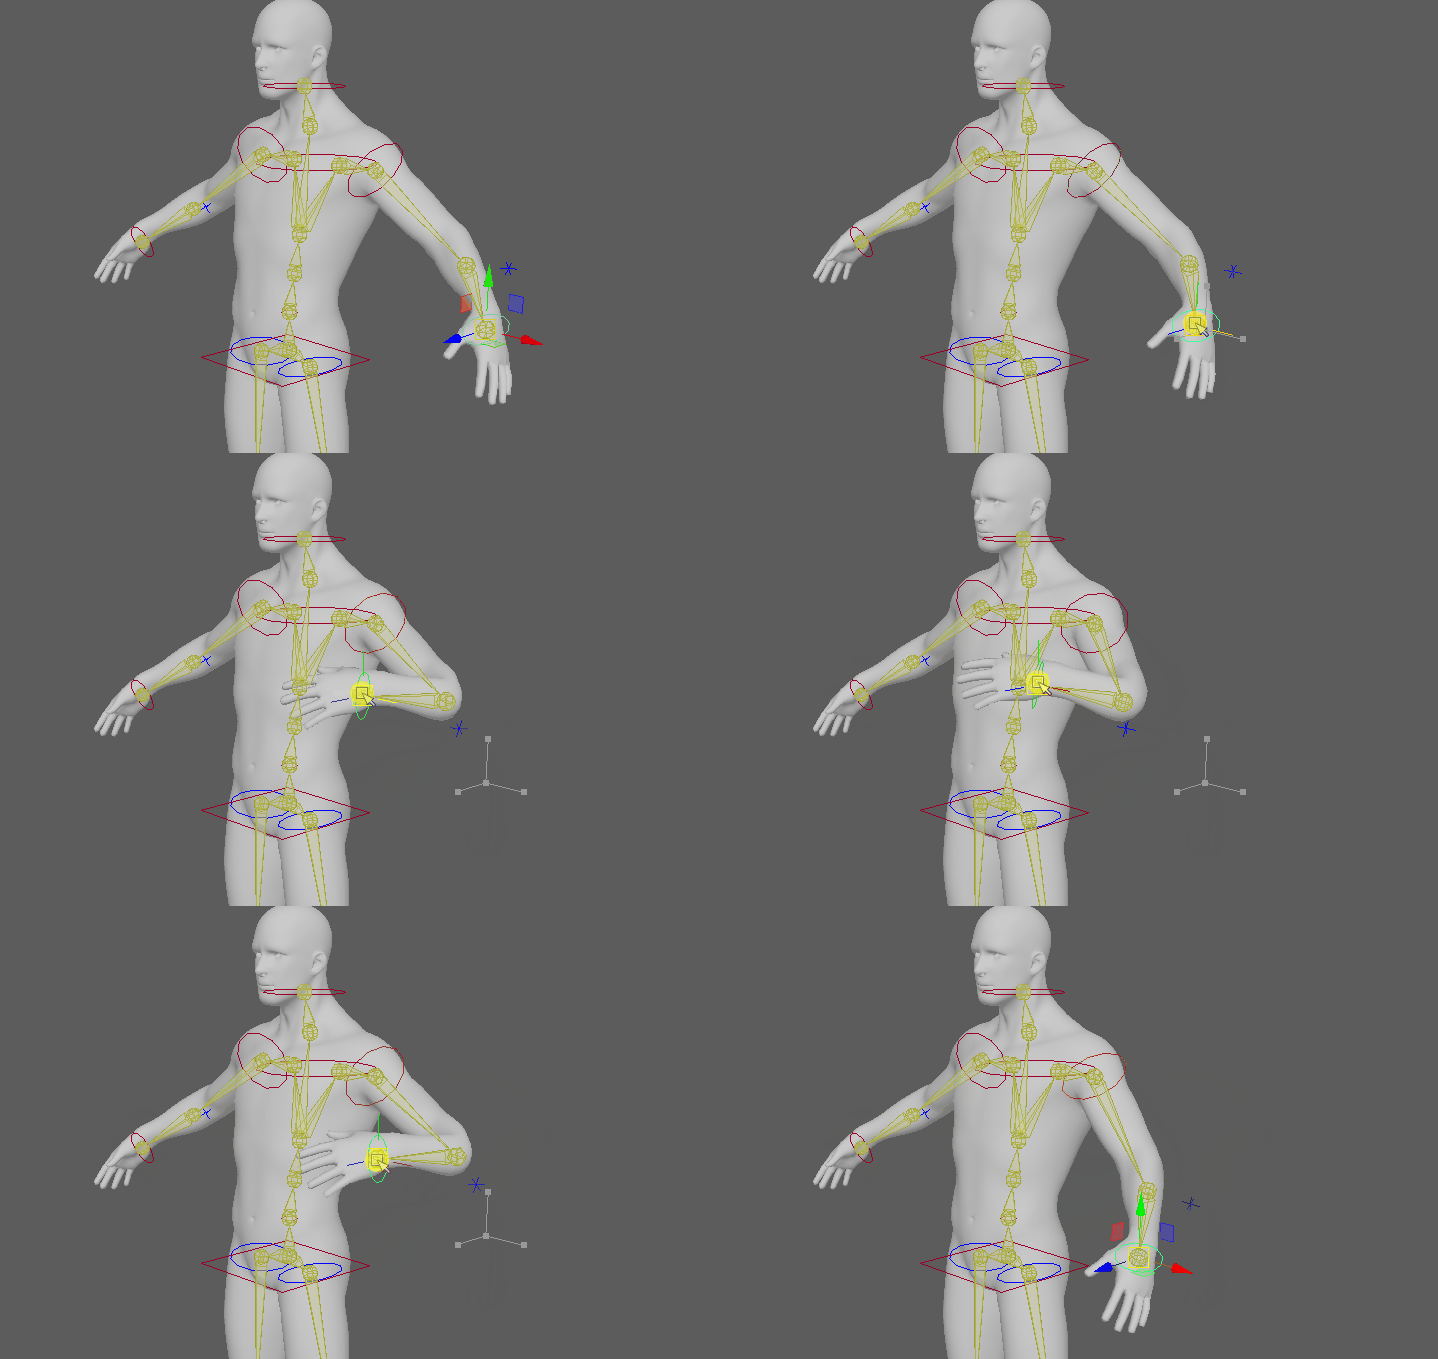
IK or Inverse Kinematics is done by moving the end of a chain of bones into position and the parameters set in the rig will work out where the rest should be. This method also means you can change something further up the chain without affecting the endpoint. This is useful when the bones have limited movements and need to be rooted to a position in the world such as legs and arms when interacting with things.
How To Skin An Object
Skinning
After you have set up a skeleton you will need to skin the mesh to the skeleton. During this stage, you will paint ‘weights’ onto the vertices of the model which will determine which bones they should follow. These weights can be blended between multiple bones to create a smoother transition. This is how the program knows which parts of the model should follow the upper arm bone, which bits should follow the lower arm bone and which part of the body is the elbow, which will blend between the two bones to give it a nice bend.
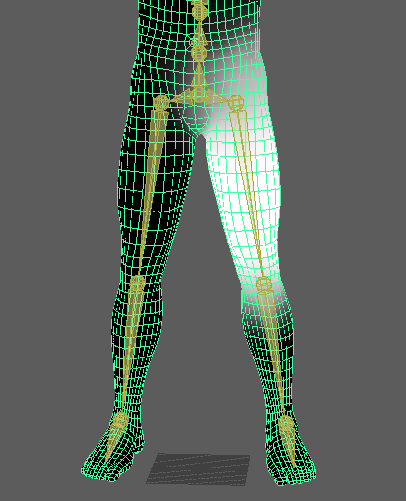
Volume-Preserving
However, the body doesn’t move in a nice predictable way that can easily be replicated with simple movements. Areas such as the crease of the elbow are hard to get looking right as well as shoulders deforming in the right way. To fix these issues you need to do what is called ‘volume-preserving’ this will allow the model to know that it shouldn’t bunch up or cut off corners of the model, instead, it should try to preserve the volume that is there in a way that a physical body would.
Blend Shapes For Faces
Faces are handled differently to regular animation due to their complexity. They will often use blend shapes or similar tech to allow the animator to blend between different facial expressions based on predetermined settings. This can be done by taking the base head and manipulating the points to the expression you want and the program will know where to move them when that expression is selected. These expressions can then be blended together to create more natural looks. For example, a character could be both surprised and happy with the result of something, this can be achieved by turning the surprised expression up to 80% and then the happy expression to 50% as an example. This may not always work though and the best solution may be to create a unique expression, especially if it the main character in a story-driven.
Motion Capture For Faces
More often these days, games will use motion-captured animation as apposed to hand-animated. For
Muscle Simulation
Muscle
Programs For Rigging And Skinning In Games
Maya
Autodesk’s Maya is one of the most common programs for rigging. It’s capable of handling effective rigging for both games as well as movies and TV. It has a wide range of tools that are powerful enough to create any kind of rig you might need. Maya is traditionally the most popular of Autodesk’s pieces of 3D software for rigging.

Maya is a very common piece of software within the games industry, possibly the most popular. If you are looking for an industry
3ds Max
3ds Max is the sister program to Maya. It is also owned by Autodesk and both programs function and perform in very similar ways. Although Maya was traditionally the rigger’s favorite program the gap between them has lessened over time and either can be used easily enough.

3ds Max is considered an industry-standard program and whether a company uses Maya or 3ds Max is usually up to the companies person choice. Maya is probably the better choice to learn, but either works well and the skills are fairly easily transferred from one program to the other.
Blender
Blender is a free 3D program that has a wide array of functions that cover many areas. As the program is free it is a good place to see if you like the job and practice. Like 3ds Max and

The down side to Blender is it is not industry standard. While it can be a great place to start you will need to have experience with a more recognized program before being taken too seriously for a job position. This is why we recommend learning 3ds Max or Maya if you are serious about getting a job in industry.
This is part of our Making Games series. If you’d like to learn more about the other aspects of making games then check it out.