How To Create A 3D Model – A Beginners Guide
The world of 3D art is exploding. From games producing more and more realistic and impressive graphics to the advent of home 3D printers, more and more people are looking into how they can generate their own 3D models. The truth is, it’s quite simple, but it’s hard to master. Generating a simple game character or small 3D printed model can be quite simple, but to produce the high-end art you see in many games could take many years and multiple people to accomplish. For now, we’re going to look at how to create a 3D model of your own.
3D Programs
To start with you will need a program that can create these models. There is a wide variety to choose from that we’ve covered in this article, but assuming you are just starting out you are probably looking for a free version, of which Blender is the biggest and most powerful. This will give you everything you will need to generate the model.
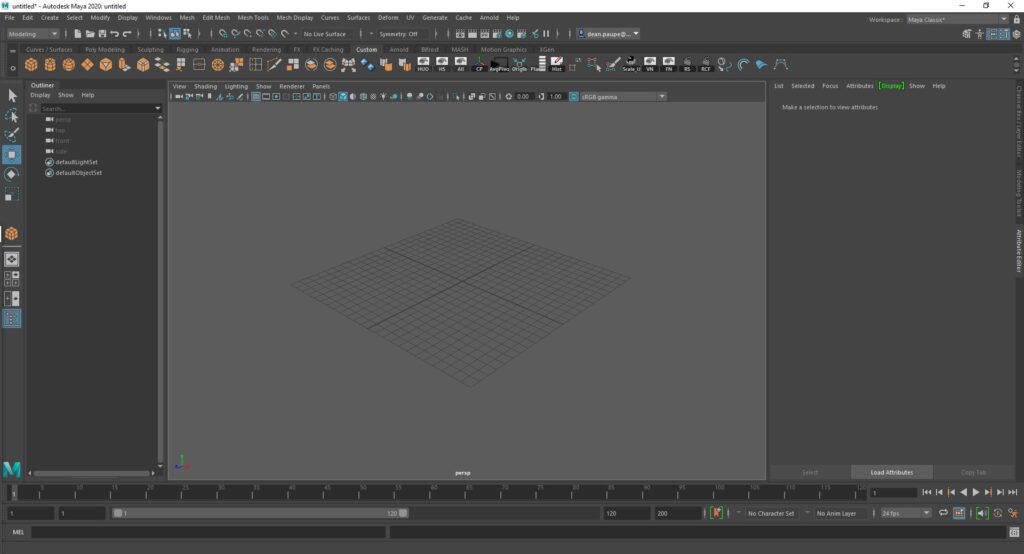
A 3D modeling program will give you an area called a view-port, that you can navigate your camera around in a 3D space to view all angles of the object you are making. You will also have an intimidating amount of buttons and menus. Don’t worry though, most of these can be ignored. 3D programs have the ability to do a huge variety of tasks from animation to VFX work, but we won’t need to worry about those.
3D Modeling Basics
In 3D modeling programs, you create objects that are built up from basic components. These components are sometimes referred to as different names depending on which programs you use but for the most part are known as Vertices, Edges, Polygons, and Objects.
Sometimes know as Points, Vertices are the most basic building block of 3D models. They are a single, 1-dimensional point that contains the coordinates of its position in the 3D space. This information is stored in the X, Y and Z-axis. The total amount of Verts is important as too many can overload the game engine. Although game engines are capable of handling massive amounts of information these days, there is still a limit when performance is taken into account.

Edges are created when two points are connected. This unifies the point into an entity and allows for the creation of polygons when multiple are connected together to encompass an area.

Polygons, sometimes referred to as Faces, are the culmination of a group of edges that encircle an area. The polygons are the part of the object that the end-user will see in the game. The most basic of these polygons is a Tri, consisting of a face with 3 edges. Game engines will always render a given object in Tris, although it is possible to work with polygons with as many edges as you want. Generally, you will want to work with polygons that have a lower number of edges as the game engine will split them all into Tris and will sometimes split them in a way that is not intended or different from what you see in the 3D program. Working purely in Tris, however, is very difficult due to the way the tools work, so it is standard to work in Quads (4-sided) and then either triangulate the object before exporting or letting the engine do it and checking for inconsistencies.

The final pieces of the puzzles are the Objects or Elements. These are a combination of a group of Polygons that make up a whole object. A final model can be made up of multiple Objects and often will need to be for certain reasons. For example, if making a car you will want to make the doors separate objects to the main chassis so that you can move them independently from the rest of the model. The only exception to this is when wanting to move things that are a single object, such as a character or a swinging rope. In these cases, you will need to create a skeleton and skin the object to that, but that is a different process that is normally handled by another department in a game studio.

Other 3D Information
With the building blocks covered you will be able to create all sorts of creations, but there’s some other information that the game engine will need to properly handle your objects.
The Pivot Point of an object defines its origin. This is the information that the game engine uses as the ‘center’ of the object, although it does not have to be in the middle of the object. This information is used for a few functions, primarily it defines the point at which the object will rotate around. Using the example of the car above, you will want the pivot point of the door where the hinges would be on the door so that it rotates around this point and opens in the way you would expect the door to.

Pivot Points will also tell the engine where to place the object. For example, if you bring an object in with the Pivot Point in the center then the object will be half-submerged in the ground. Most objects that will not move (Static Objects) will want the pivot to be placed at the bottom of the object, where you want the position of the ground to be.
Another thing to bear in mind is the Scale of the object. Whilst objects can be scaled within the engine, they will work better and require less tweaking if they are exported from the 3D program at roughly the scale the final object will be. This seems obvious but without a point of reference, it can be very difficult to tell the scale you are working in. Often people will create a 1mx1m box or bring in a human character for scale reference. 3D programs will also have settings for the scale that can be changed, usually defining one ‘Unit’ of measurement in the 3D program as either a meter or a centimeter.
3D Object Manipulation
So now we have the basics of how the program works and how the objects are created, we need to look at how we work to create amazing and complicated 3D models. Whilst it is totally possible to create an asset by manually plotting out and connecting points it would take a lifetime to create something like a 20,000 polygon character. As such 3D programs provide you with a huge variety of tools, some of which you may not discover after years of work. We’re going to look at some of the basics.
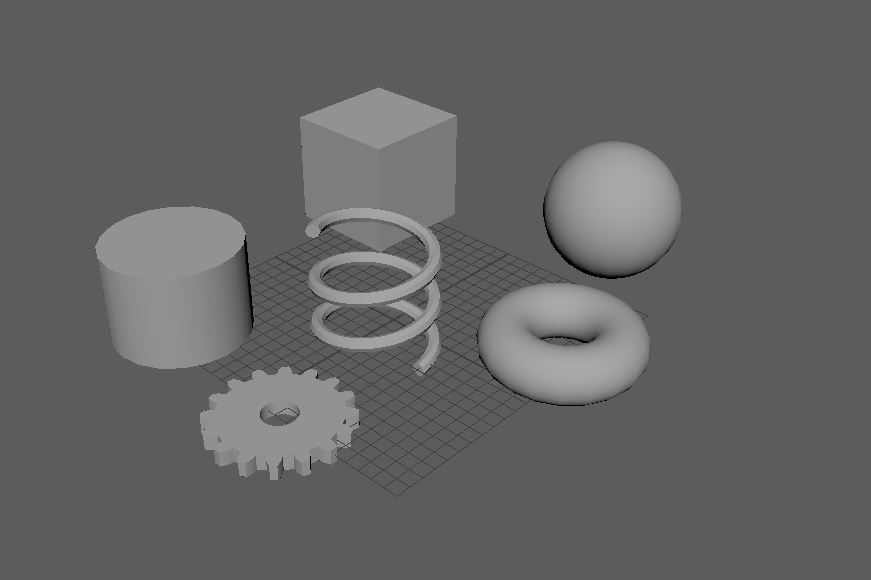
Firstly, the 3D program will give you a bunch of primitives to start with. The most used of which will be a box or a sphere but will often also include things like cylinders and toruses. These each come with various settings that can define how many polygons it’s made out of, for example with a cylinder you can set the edges to be made from 4 sides (effectively making it a cuboid) or 20 sides, making it a fairly smooth circle. These will give you the basic starting points to work from.
Some basic tools to build from these primitives include Extrude and Bevel. Extrude allows you to take any selected polygons and pull them out of the surface, allowing for an extrusion and the addition of polygons to connect the newly moved face to its original location. This allows you to build outwards from the model you had. Beveling is very similar to extruding but allows the endpoint of the poly to be bigger or smaller than the original poly, giving it a smoothed beveled edge.

Materials and Textures
The last piece to the puzzle in bringing your 3D model to life is the Material, which is made up of multiple Textures. This process begins with UV Unwrapping the model, which projects the surface of the model onto a 2D space, which allows you to project images or paintings on to the surface. Each 3D program will have built-in tools for UV Unwrapping an object that works slightly differently, or there are stand-alone programs that you can also use.

Textures can be made up of images such as photographs but these days they are more often generated in specialist programs. Photoshop used to be the most used program and still is incredibly useful for hand-painted textures, but specialist PBR texturing programs like Substance have overtaken it as the standard.

A Material is a collection of textures that have different functions. Textures can define the color of an object but it can also define things such as how shiny the surface is, or be used to bring out micro-details on the surface. A full breakdown of texture maps can be found here. Programs like Substance automate much of the process these days, but these can be manually edited in programs like Photoshop.
These are the basics you will need to know to get started, but as with all forms of art, it’s a process that you will learn and define throughout your time working in the field. You will develop your own style and workflow as you go. Due to the huge amount of tools and techniques available to the artist, it’s quite rare that any two people will work exactly the same, so finding what works best for you is the best way of developing your skills.
For our full guide on everything about being a Game Artist, check this out.
